Oven: Test Heat, Timing and Finish
Once your tins cross the oven threshold, three physical events race against the clock: gas expansion from chemical leaveners and water vapor, starch gelatinization between 62°C and 80°C, and protein coagulation up to 96°C. Controlling the rate at which heat penetrates the outer rim versus the central core determines whether your muffins dome proudly or flatten out like saucers.
1. Two-Stage Thermal Profiling
Why do bakery muffins exhibit a high, rounded dome with a dramatic central split? During the first 5 to 7 minutes at 220°C (425°F), intense radiant and conductive heat rapidly sets a ring of crust around the outer perimeter of the exposed batter. Meanwhile, the insulated center remains fluid. As steam and double-acting baking powder expand inside the cup, the batter has nowhere to spread laterally—it is forced straight upward through the top center like magma through a volcanic cone.
At minute 6—without opening the oven door—reduce the thermostat to 190°C (375°F) for the remaining 12 to 15 minutes so the interior finishes gelatinizing without scorching the sugar-dusted crown.
Contextual Caution: Convection Fans & Dark Pans
Strong rear convection fans blow rising domes sideways into wind-swept peaks and set the top crust before vertical expansion finishes. If your oven forces convection on, drop temperatures by 15°C (25°F) and rotate the tray 180 degrees at minute 12. Likewise, dark-coated steel pans absorb radiant energy far faster than bare aluminized steel—reduce bottom-heat exposure by placing dark tins on an insulated aluminum half-sheet pan.
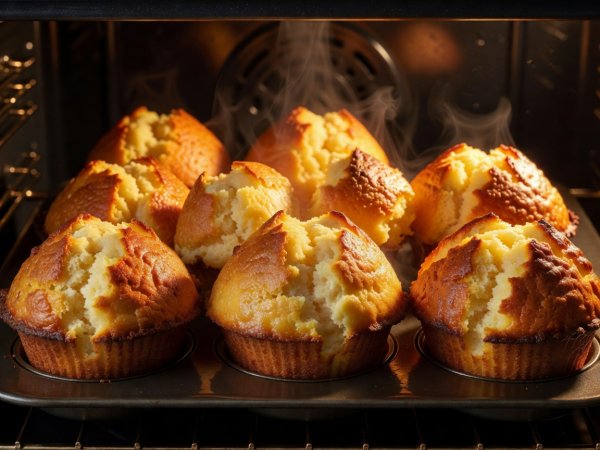
The Checkerboard Cavity Layout
In a standard 12-cup tin, filling only 6 alternating cavities in a checkerboard pattern increases convective airflow around each cup by 40%. The hotter air current sets the side walls faster, lifting domes 8mm to 12mm higher than a crowded 12-cup tray.
2. Tin Metallurgy & Liner Selection
| Pan Material | Thermal Conductivity | Bottom Crust Color | Recommended Temperature Adjustment |
|---|---|---|---|
| Light Anodized Aluminum / Aluminized Steel | High, even conduction; reflects excessive radiant heat | Golden blonde, thin tender wall | Standard baseline (220°C burst → 190°C finish) |
| Dark Non-Stick Carbon Steel | High radiant absorption; rapid edge heating | Deep amber to dark mahogany | Reduce oven temp by 10°C–15°C; shorten bake by 2 mins |
| Cast Iron Muffin Pan | High thermal mass; slow heat-up, intense retention | Crisp, caramelized cornbread-style edge | Preheat pan for 10 mins only for savory/corn batters |
| Silicone Mold | Poor conductor (acts as an insulator) | Pale, steamed, soft sides with weak lift | Not recommended for high-crown artisan muffins |
3. Objective Doneness Cues vs. The Toothpick Myth
Sticking a wooden toothpick into a fruit-studded or chocolate-chunk muffin produces false negatives when you hit a molten inclusion and false positives when the crumb is already overbaked to 100°C. Replace guesswork with three observable cues:
- Internal Core Temperature: Insert a thin-tip digital thermocouple vertically into the center of the crown. A rich, high-sugar bakery muffin is fully set yet maximally moist between 94°C and 97°C (201°F–207°F). Leaner whole-grain muffins finish cleanly at 98°C (208°F).
- Tactile Crown Spring: Press the center crevice of the dome lightly with your index finger. It should feel resilient and spring back within one second without leaving a wet indentation.
- The 5-Minute De-Panning Window: Leave baked tins on a wire rack for exactly 5 minutes so fragile warm starch retrogrades enough to hold its shape, then lift every muffin out onto the wire grid at a 45-degree tilt so bottom steam vents into the room instead of soggifying the paper liner.